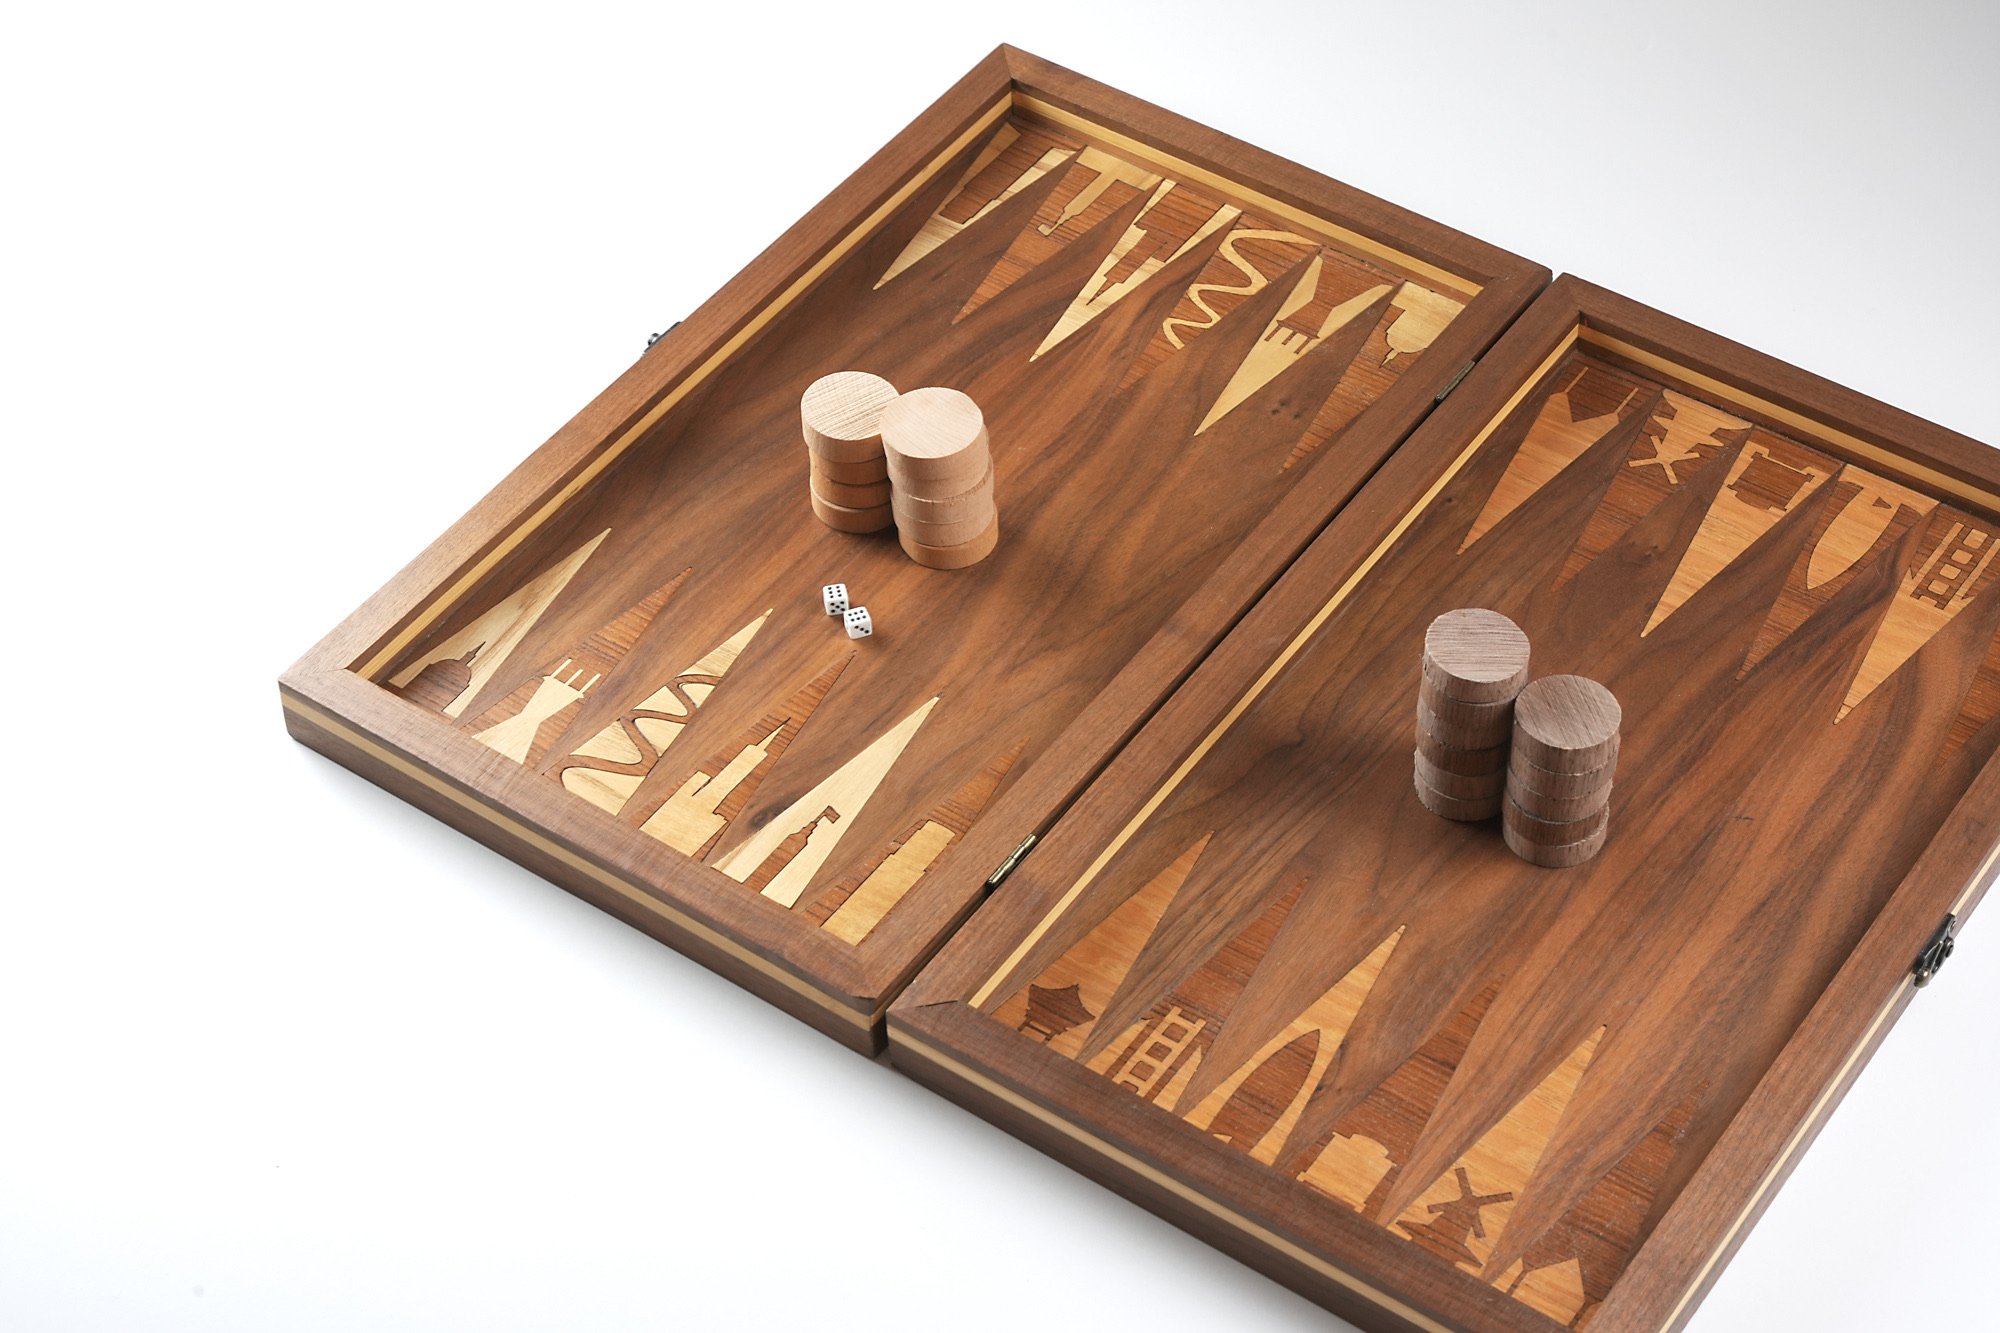
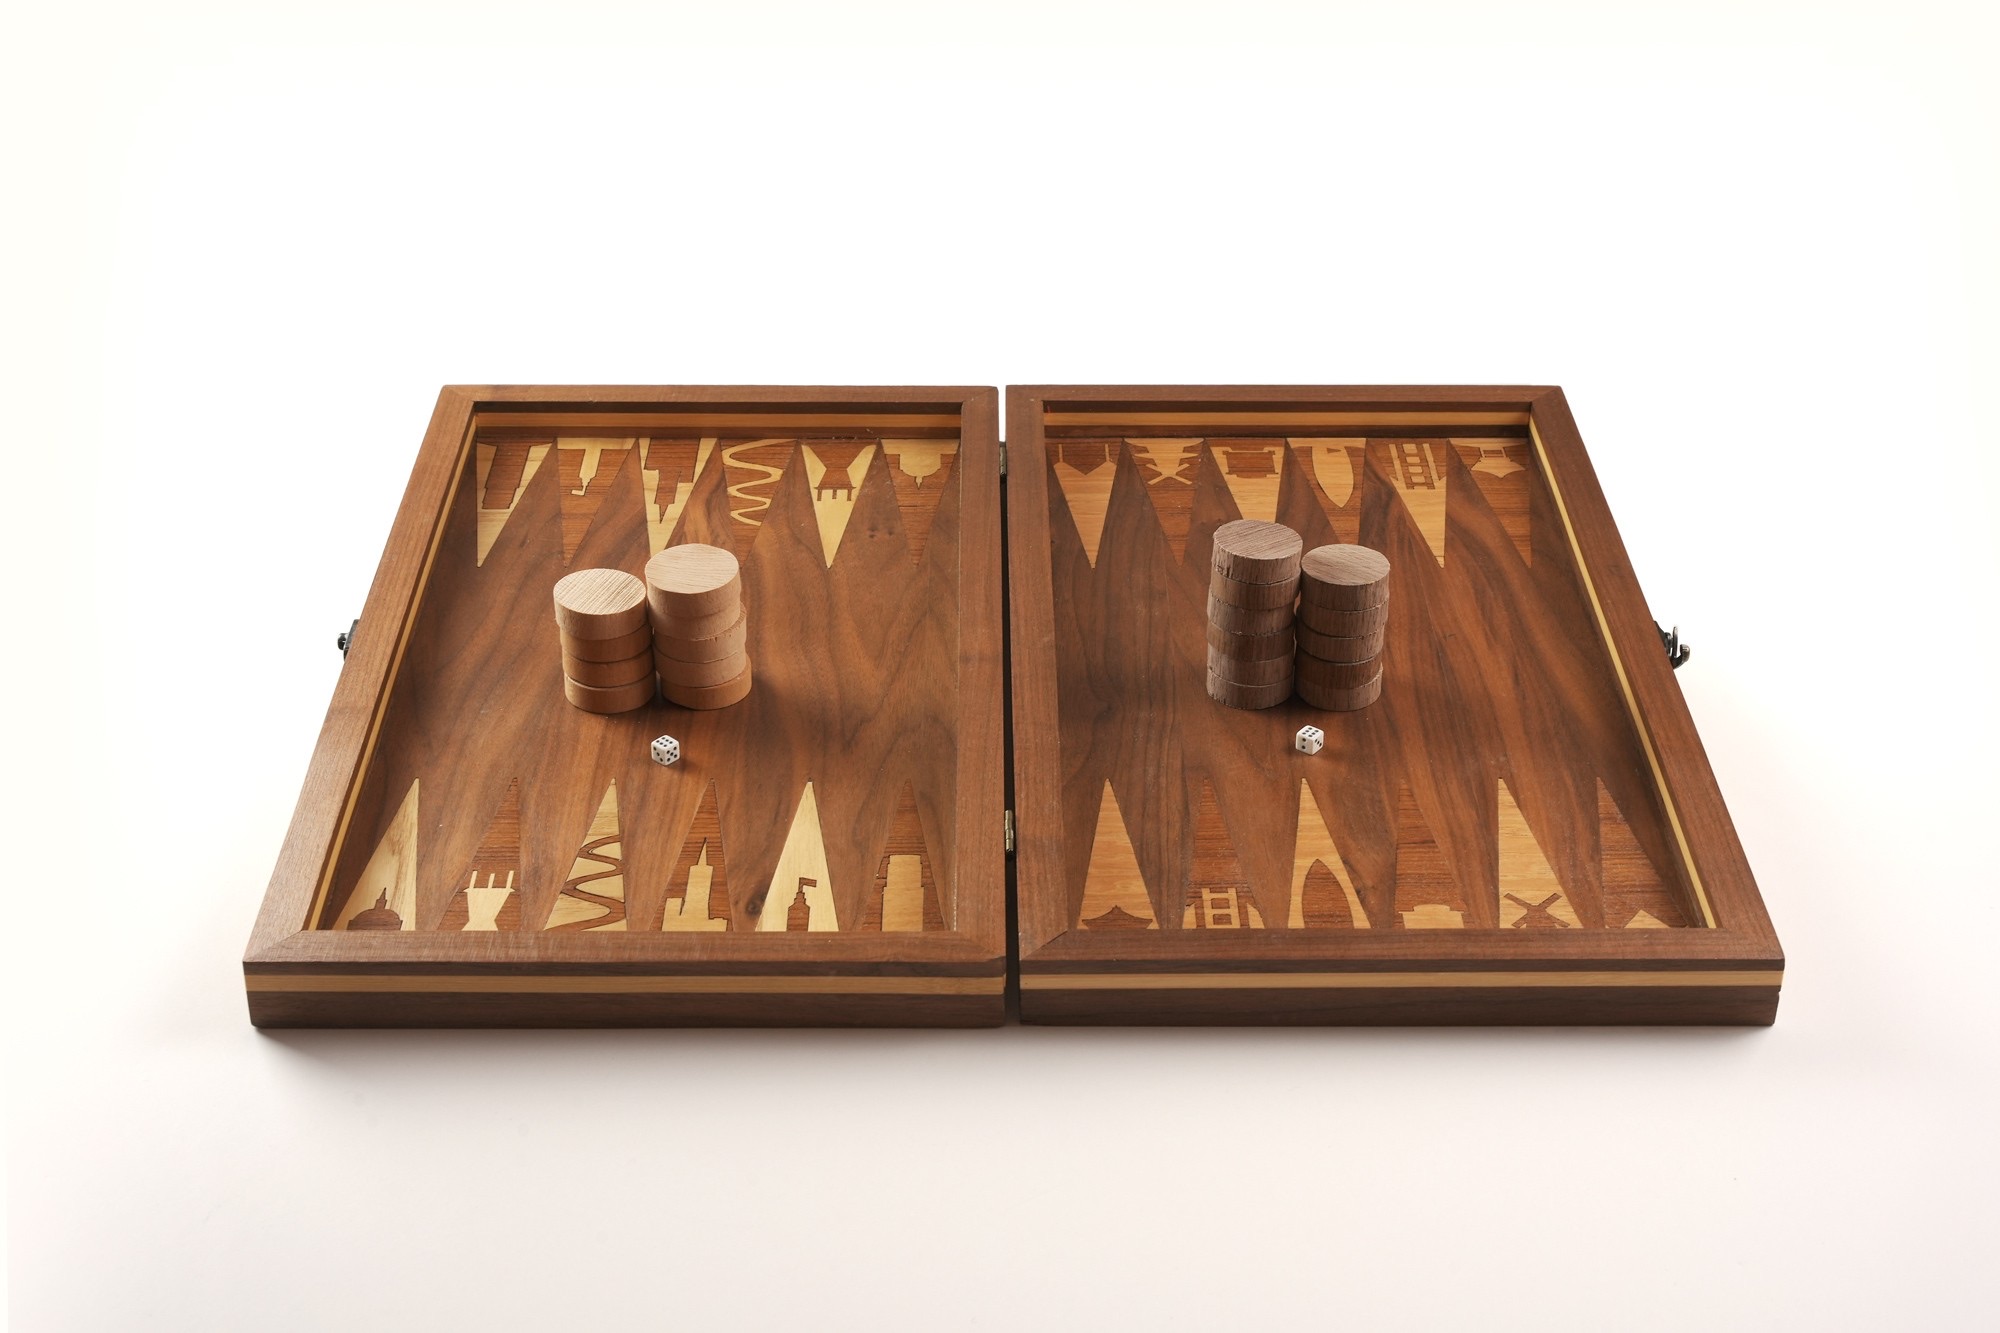
SF Backgammon
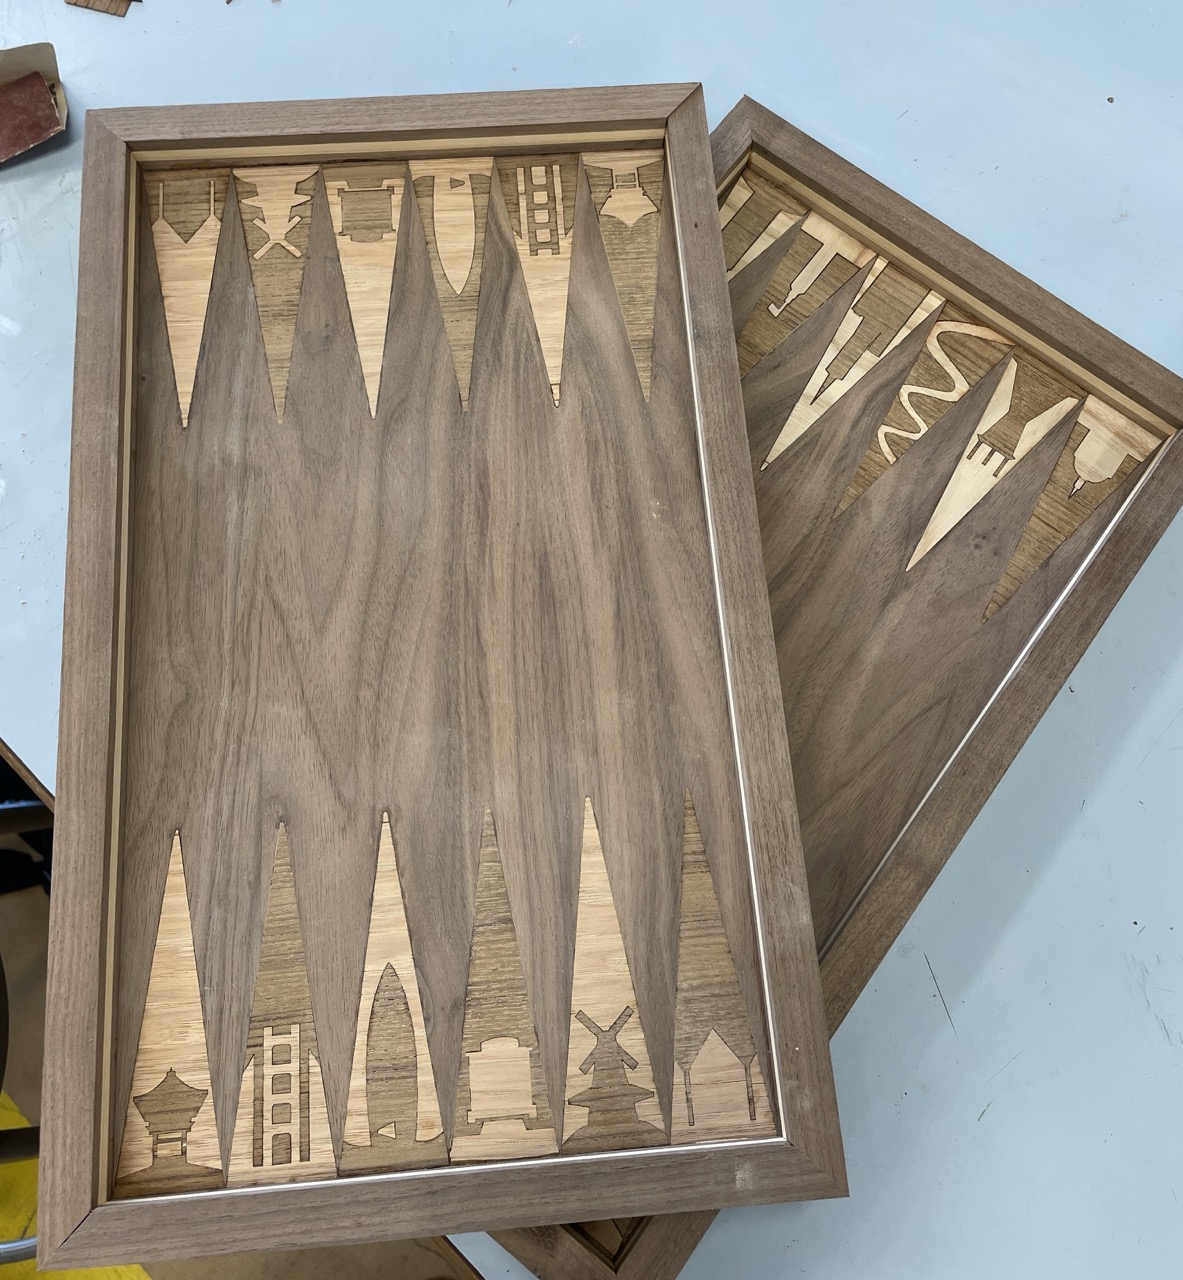
Hand-crafted backgammon board with veneer inlays of San Francisco monuments.
Most of the physical projects I've created have had some relation to San Francisco, whether it be public transit or some other form of city data. And all have included electronics or code in some way.
I wanted to see what it would be like to create a San Francisco themed project without code or electronics, to explore hands-on, detailed, and intricate work, three things I'd missed in many recent projects. And I'm so glad I did.
Inspiration
Backgammon has a huge cultural significance to the Armenian side of my family. At any family event, you'll hear the clacks of moving pieces or taps of rolling dice. Most of my Armenian side lives in Southern California, far from my home. I wanted to connect my Armenian side to where I call home, San Francisco.
I started on paper, then moved to triangle designs in Rhino.
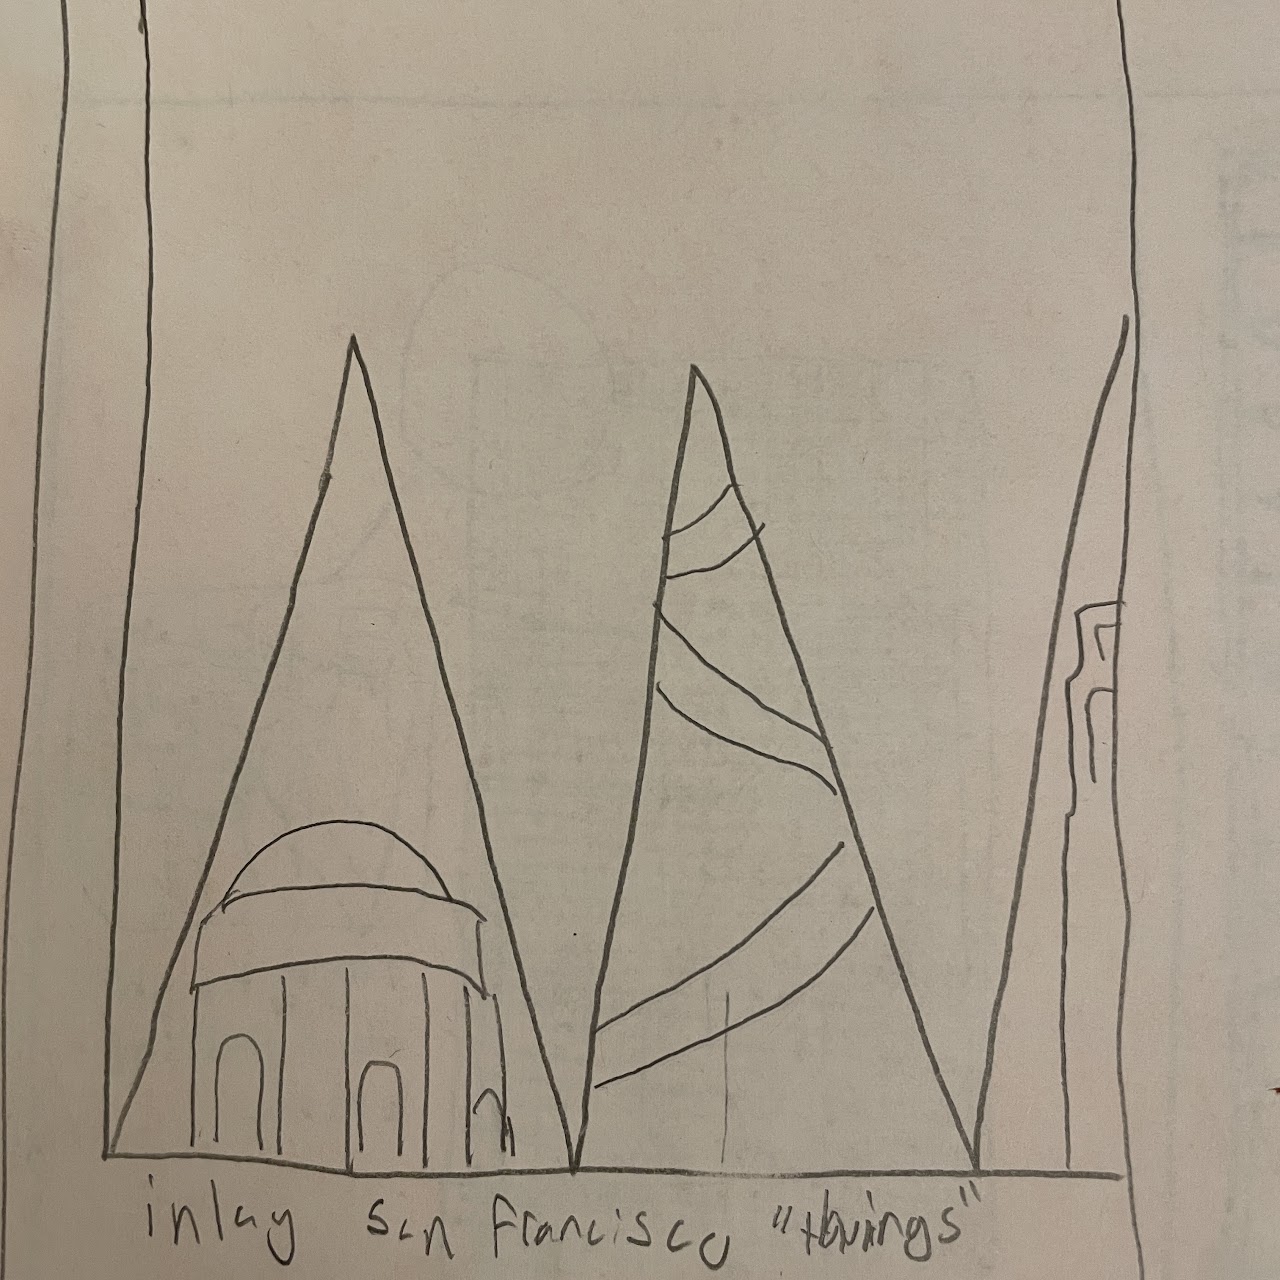
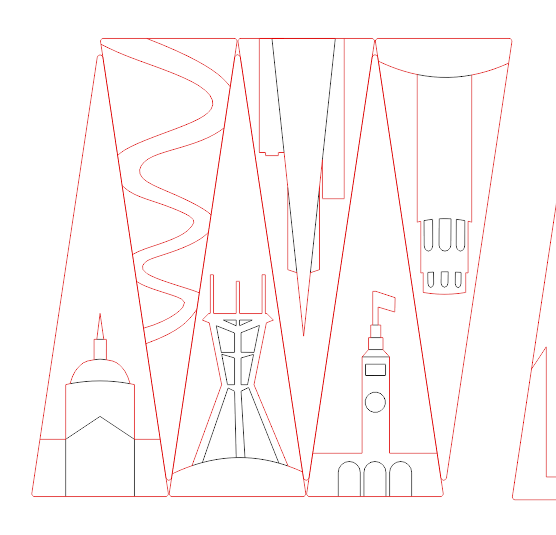
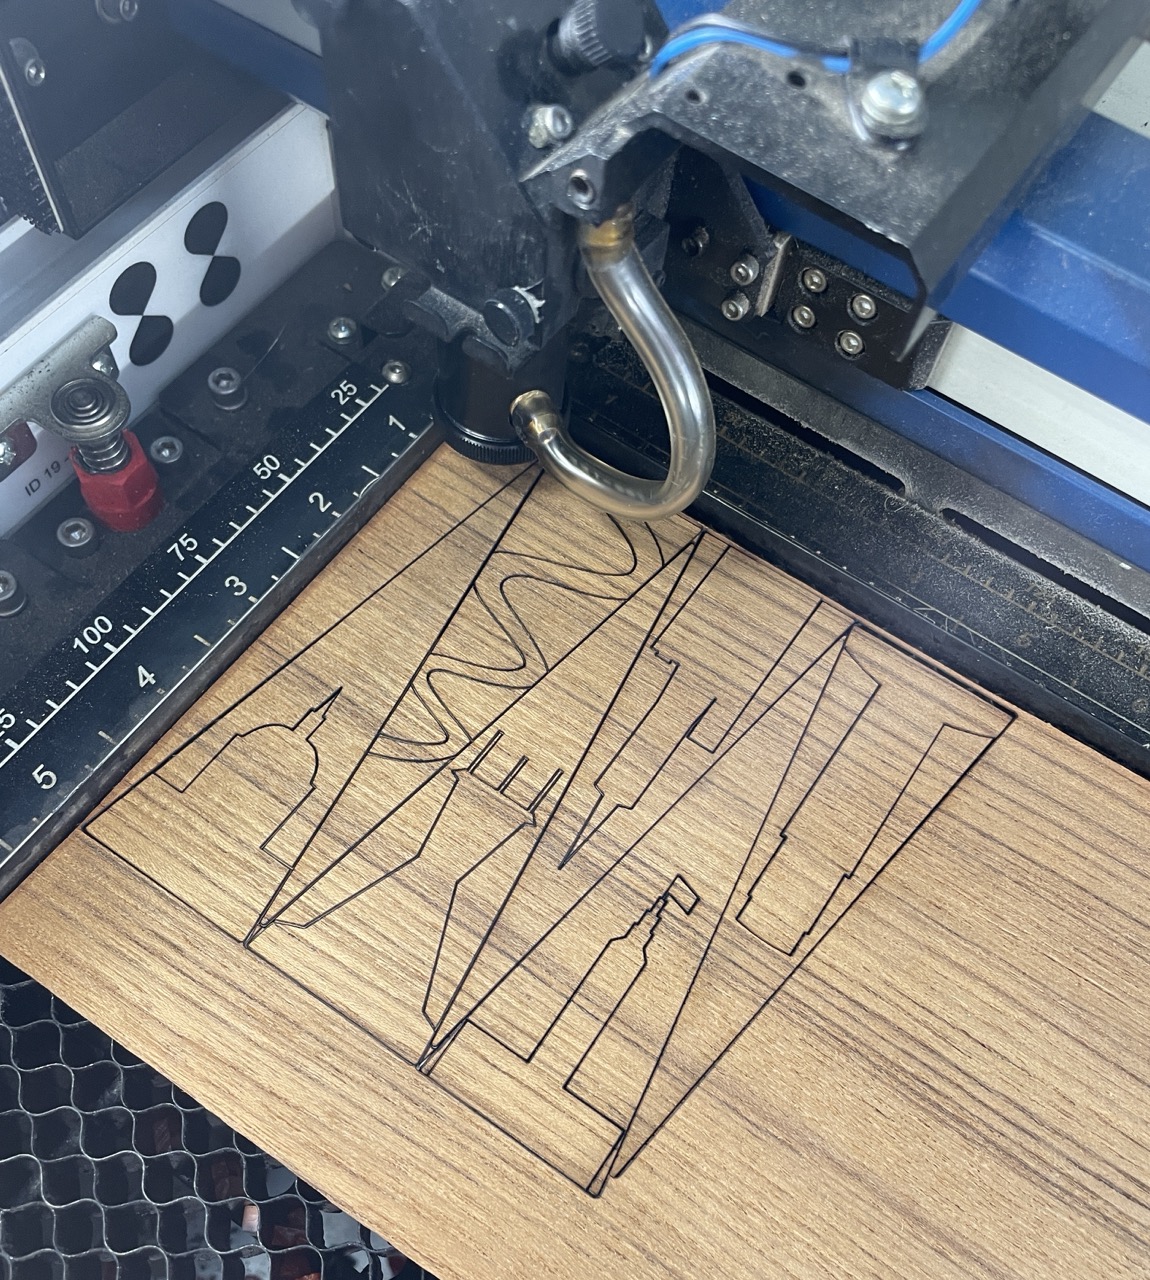
Veneer Inlays
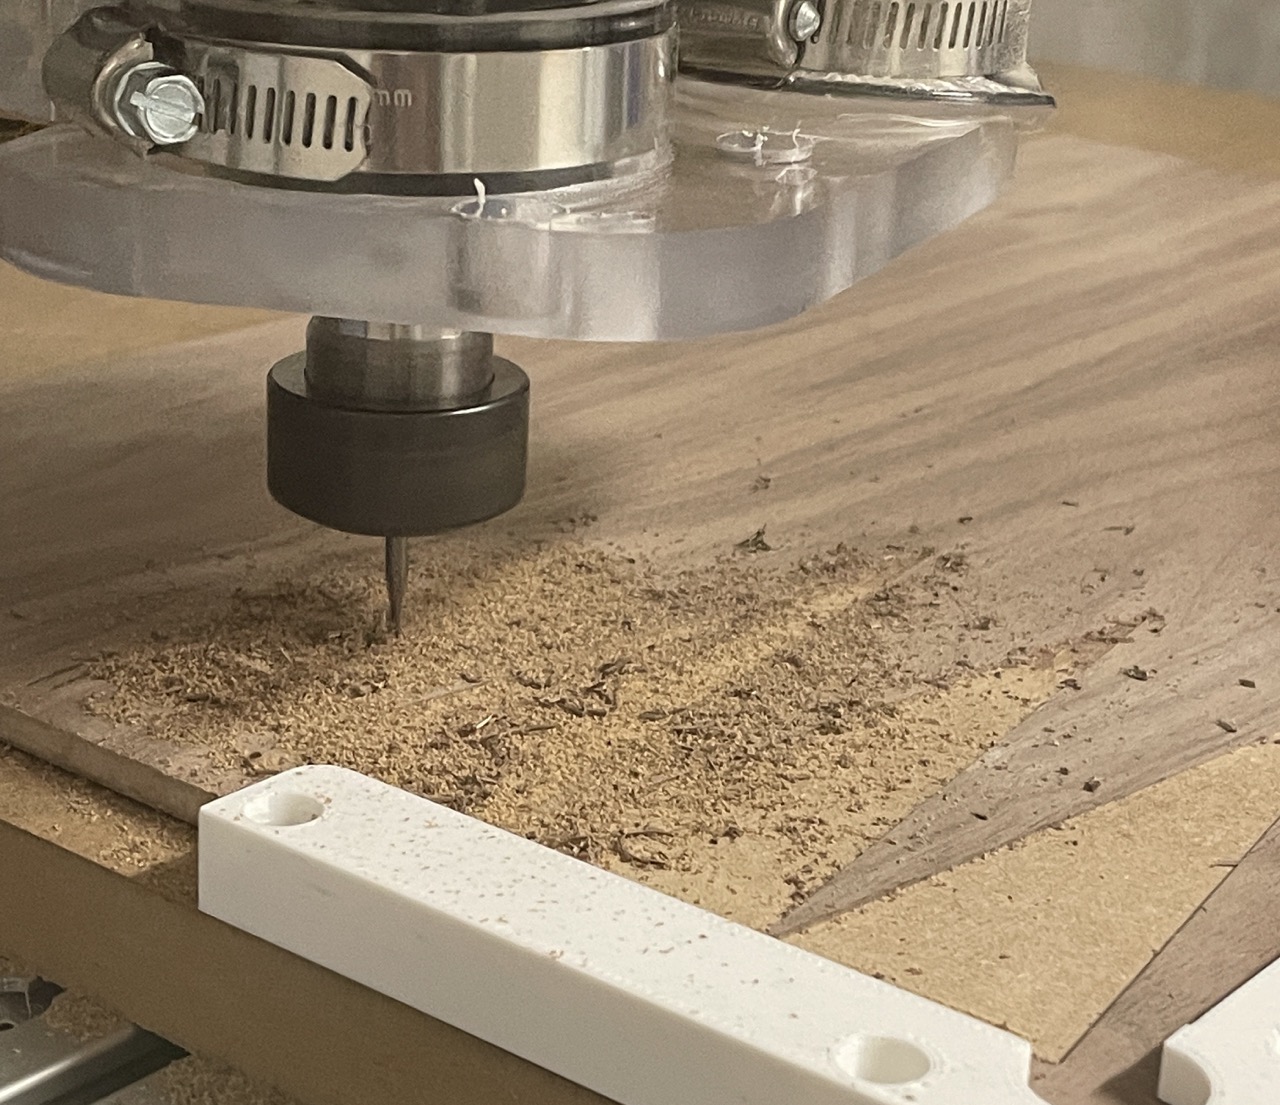
The first challenge arose transfering these intricate patterns from Rhino onto the board. Veneer is very delicate, and although thin, has some thickness to it. The veneer pieces would need to be inlayed into the base board, sunk into places cut out for them.
To create indents for the veneer to sit in, I decided to use a CNC router. Although not super accurate depth-wise, it would create perfectly fitting spaces that matched the laser cut veneer pieces exactly. And any extra height could be sanded out afterwards.
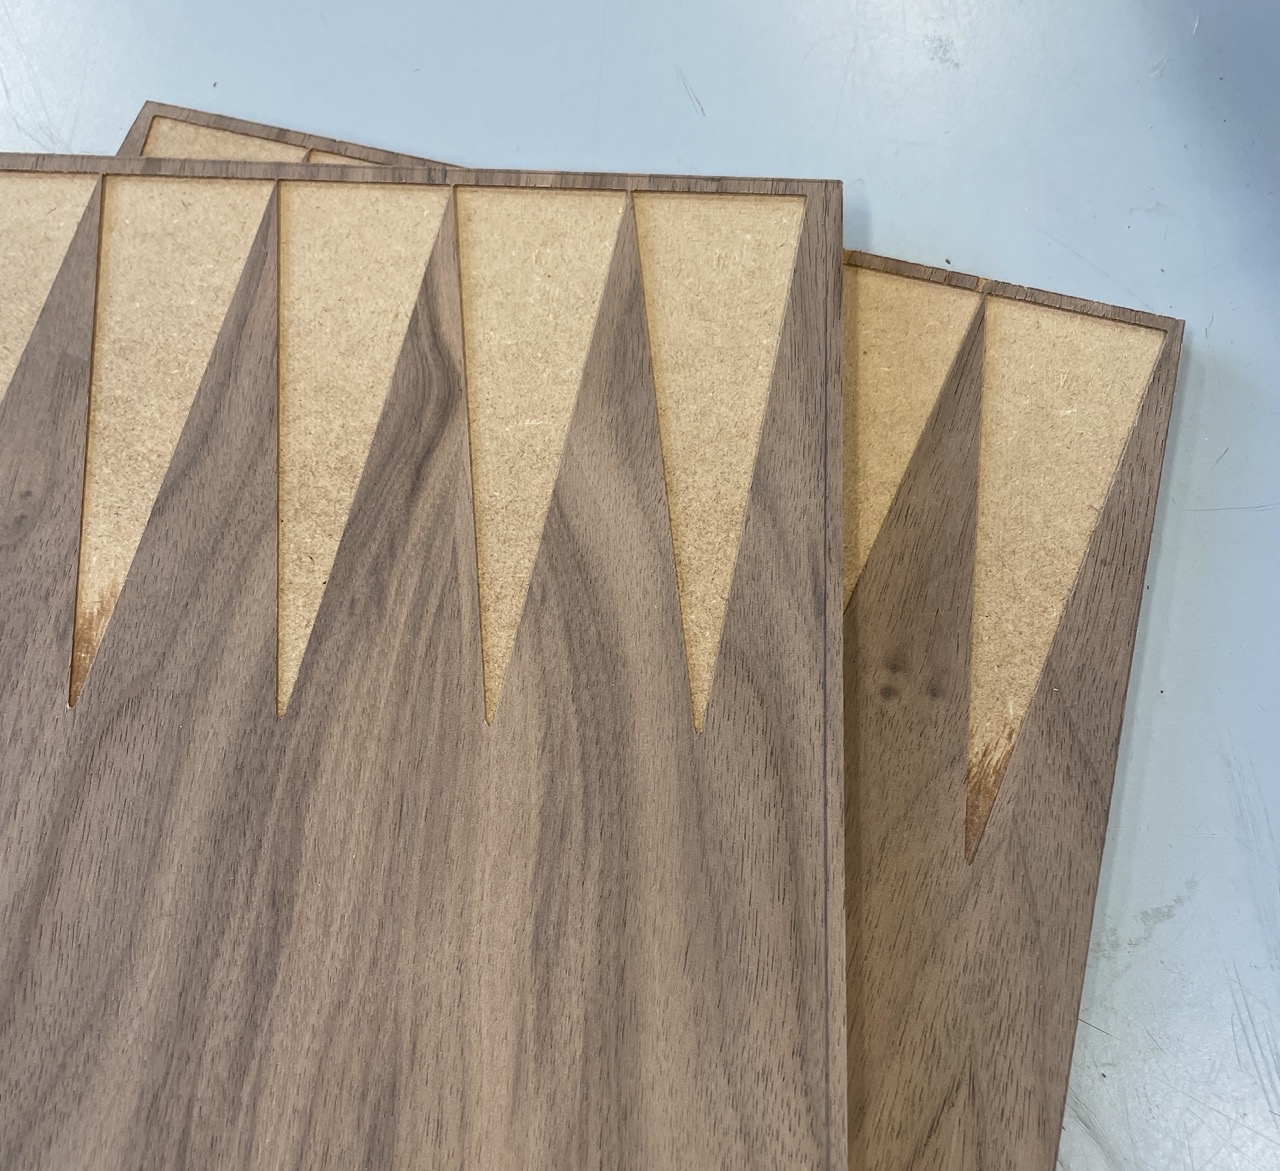
Cutting by veneer hand would be difficult, so I decided to laser cut the pieces, using as little power as possible to eliminate laser cut outlines.
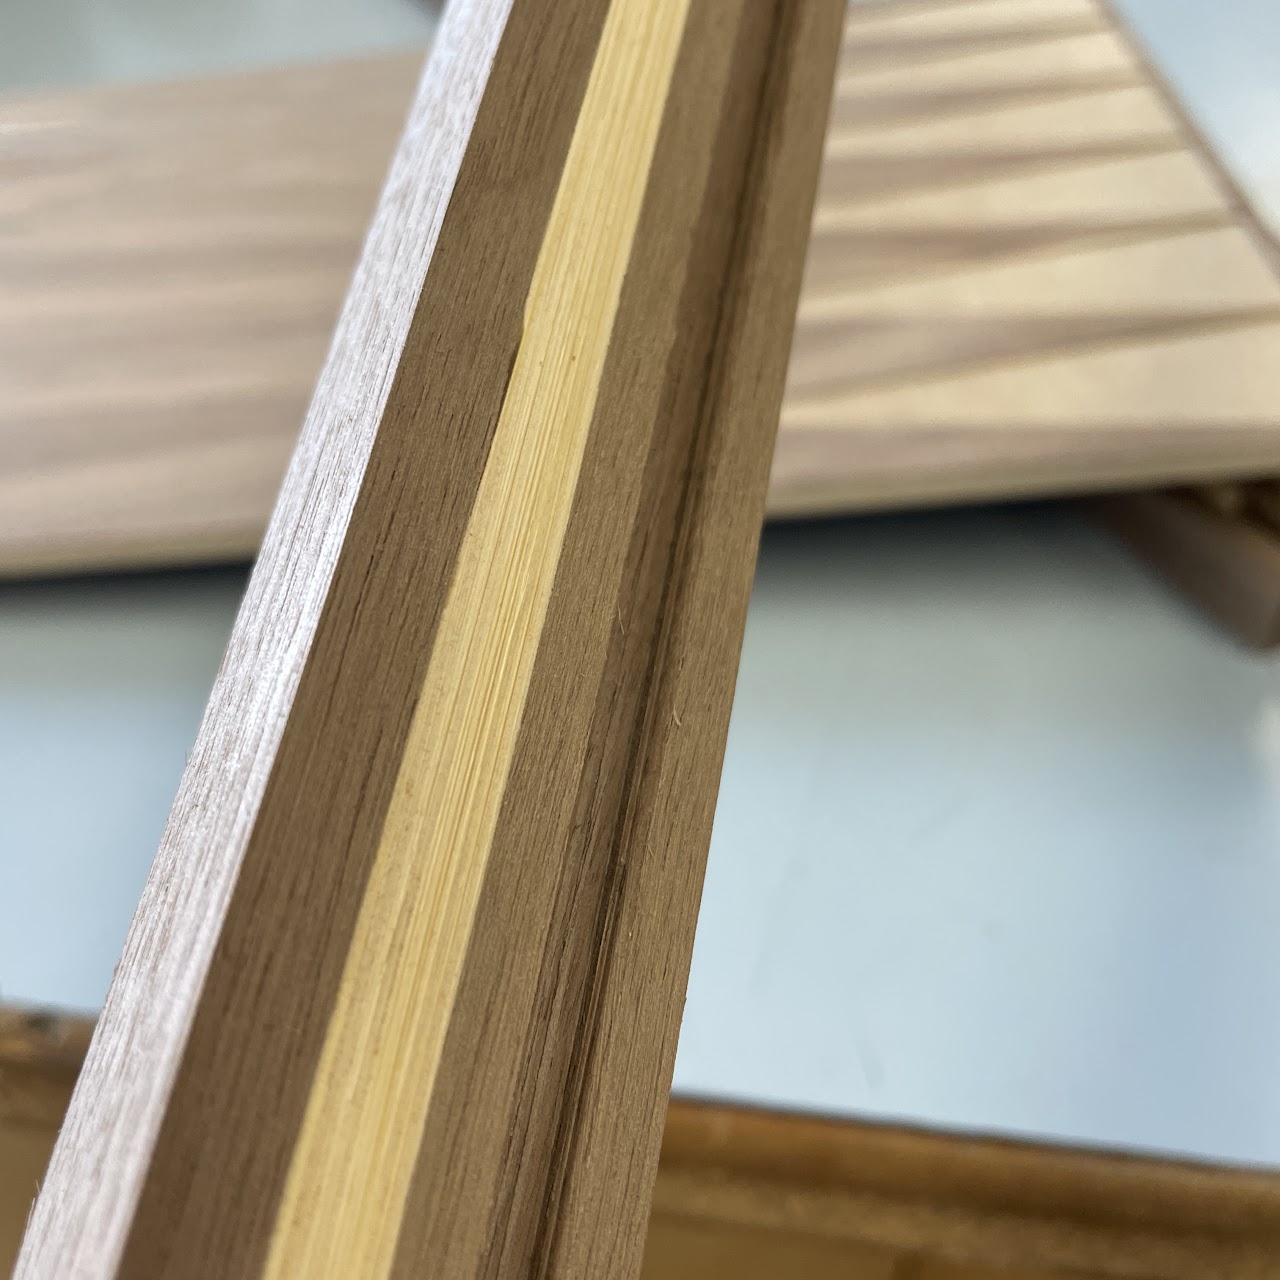
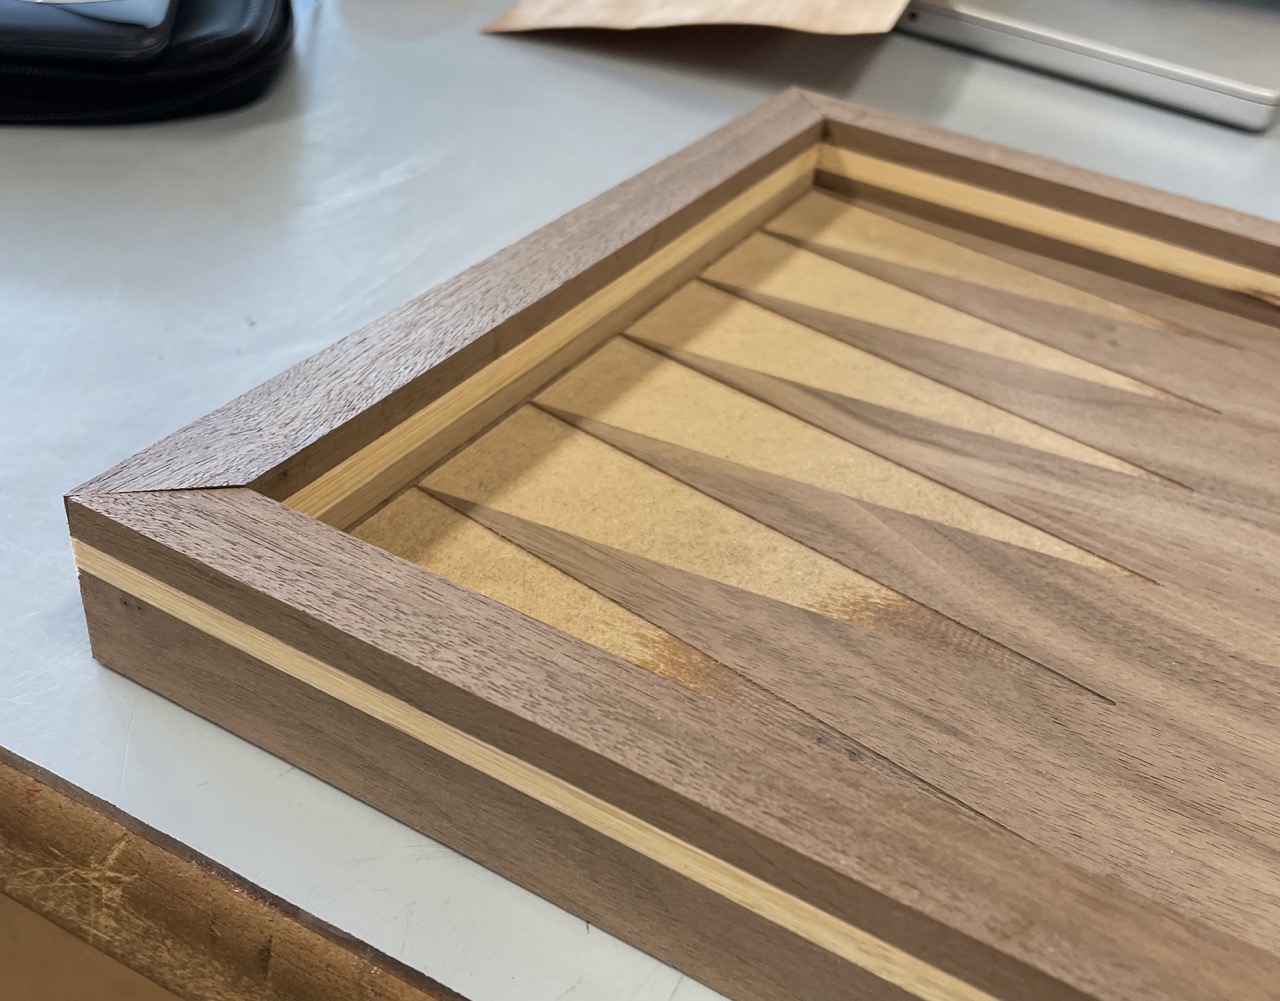
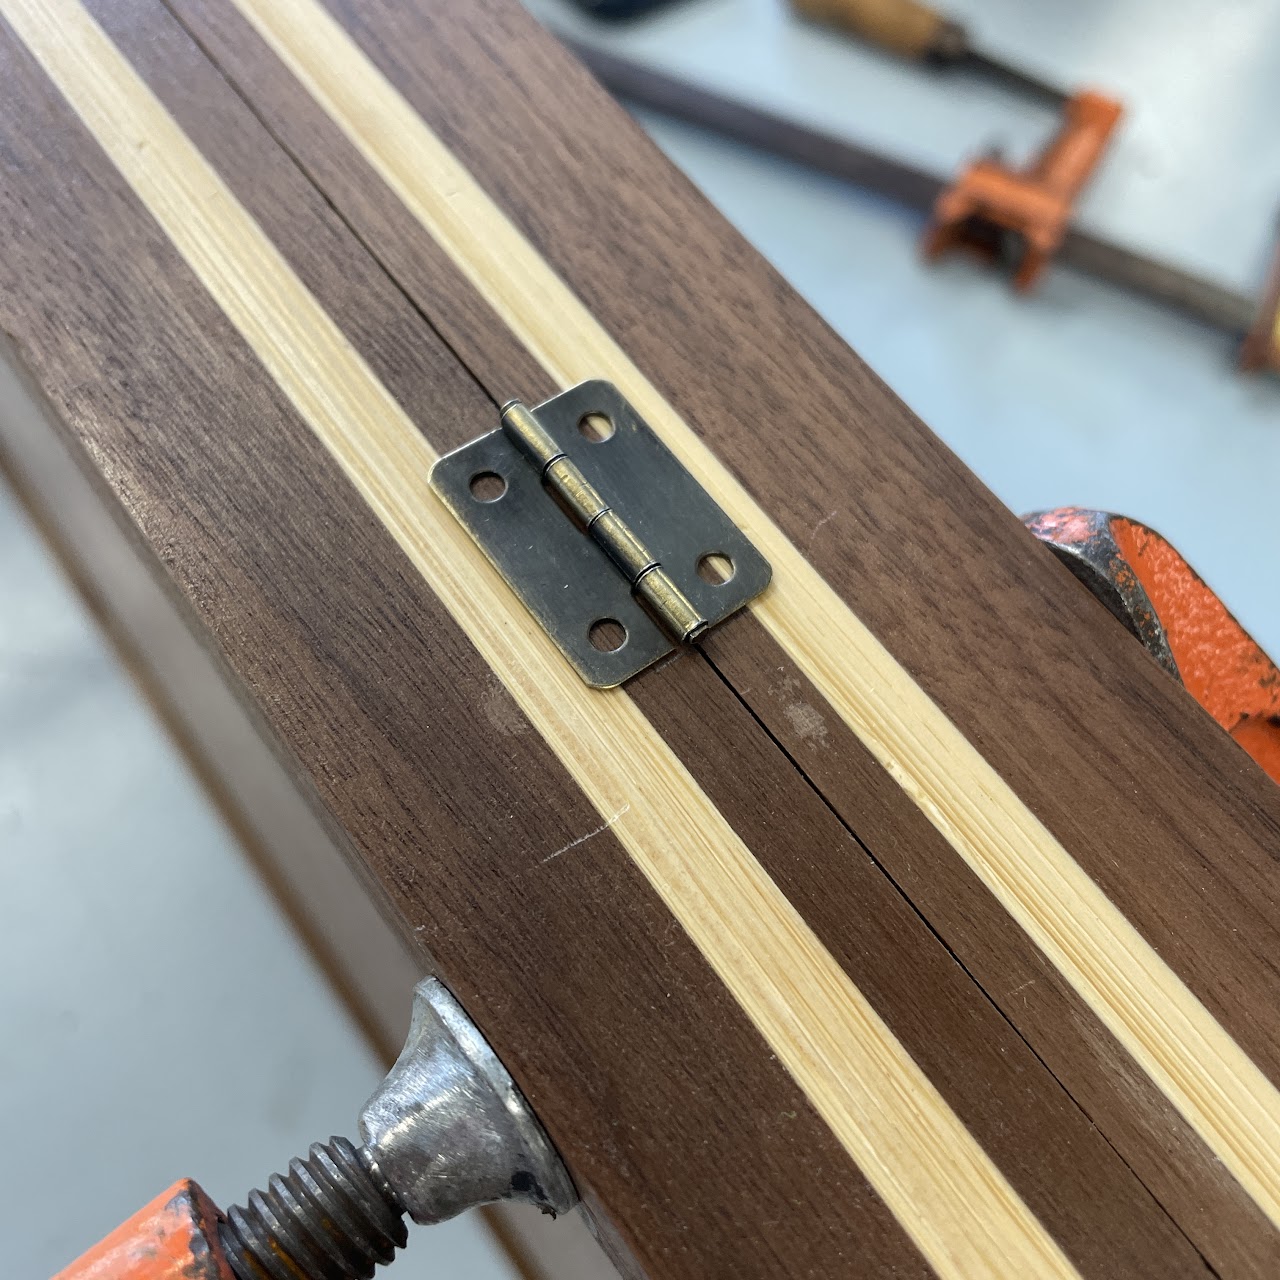
Sides
I created the board sides by joining three pieces of wood, two walnut and one bamboo. Although uneven at first, sanding brought all of them back to the perfect size. I used a table saw to cut slots/slits into the sides to fit the main board in securely.
Gluing & Sanding
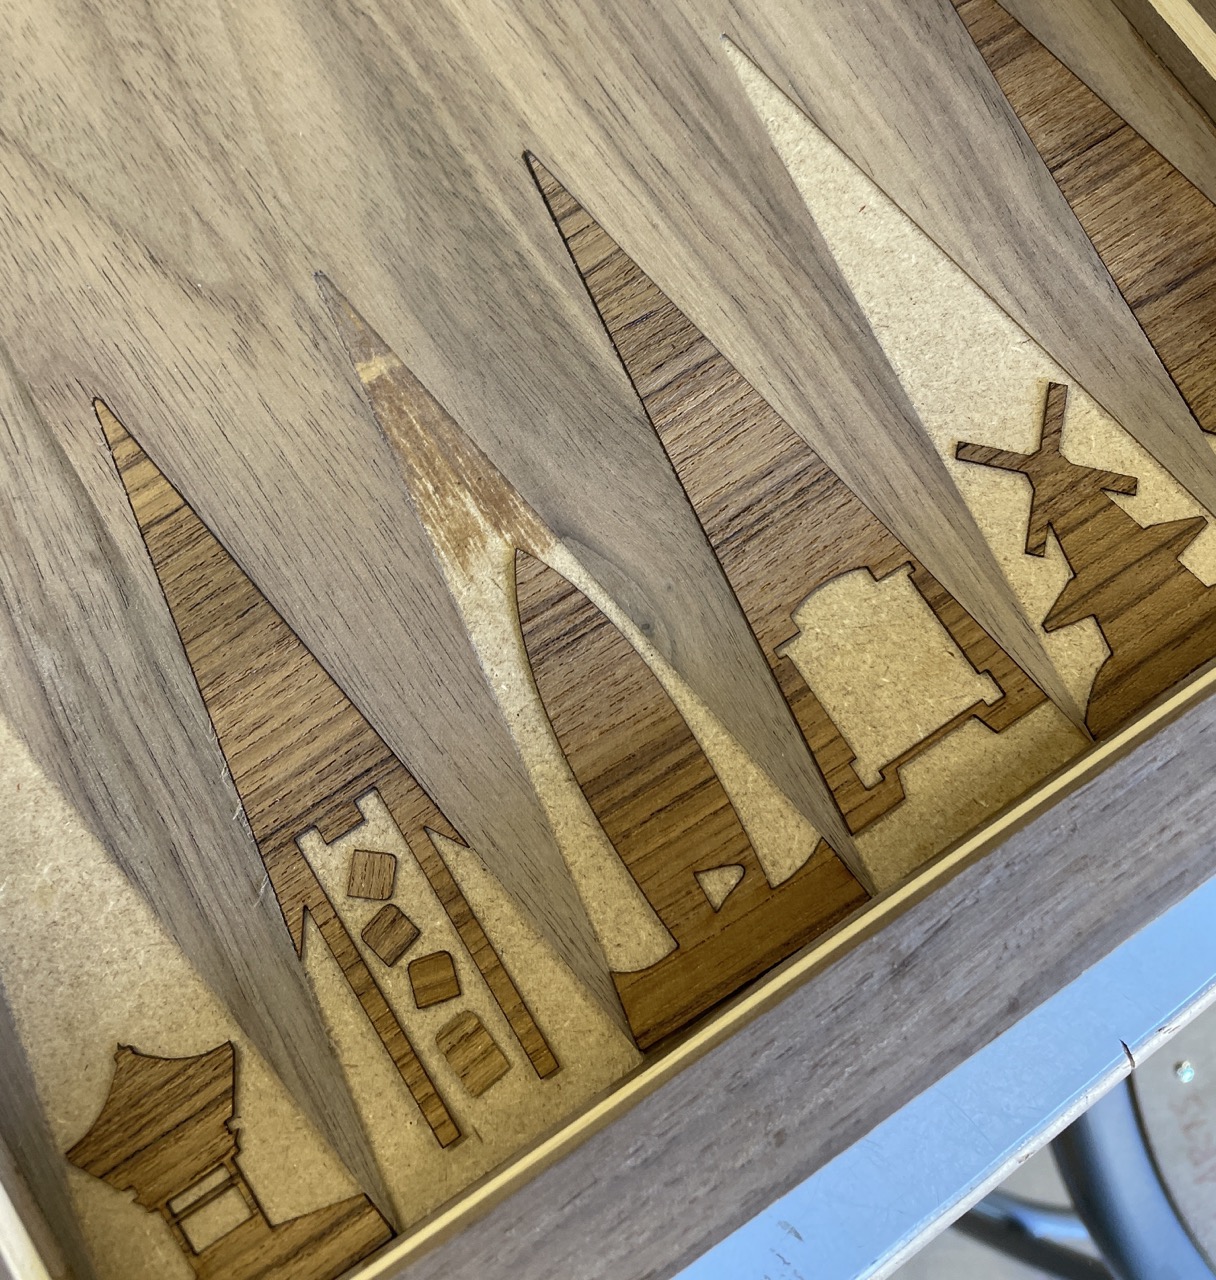
One by one, I painstakingly (you'll see) placed each veneer piece into a triangle, and super glued it into place.
Throughout this process, I broke at least three times as many veneer pieces as I used. The tips of the triangles cracked off easily while sanding, and I repetitively glued the pieces to my hands.
I discovered that gluing the pieces in upside-down from the laser cutter would eliminate any gap between them, or appearance that they were laser cut in the first place.
Then, I sanded to remove any glue residue and unevenness between the layers.

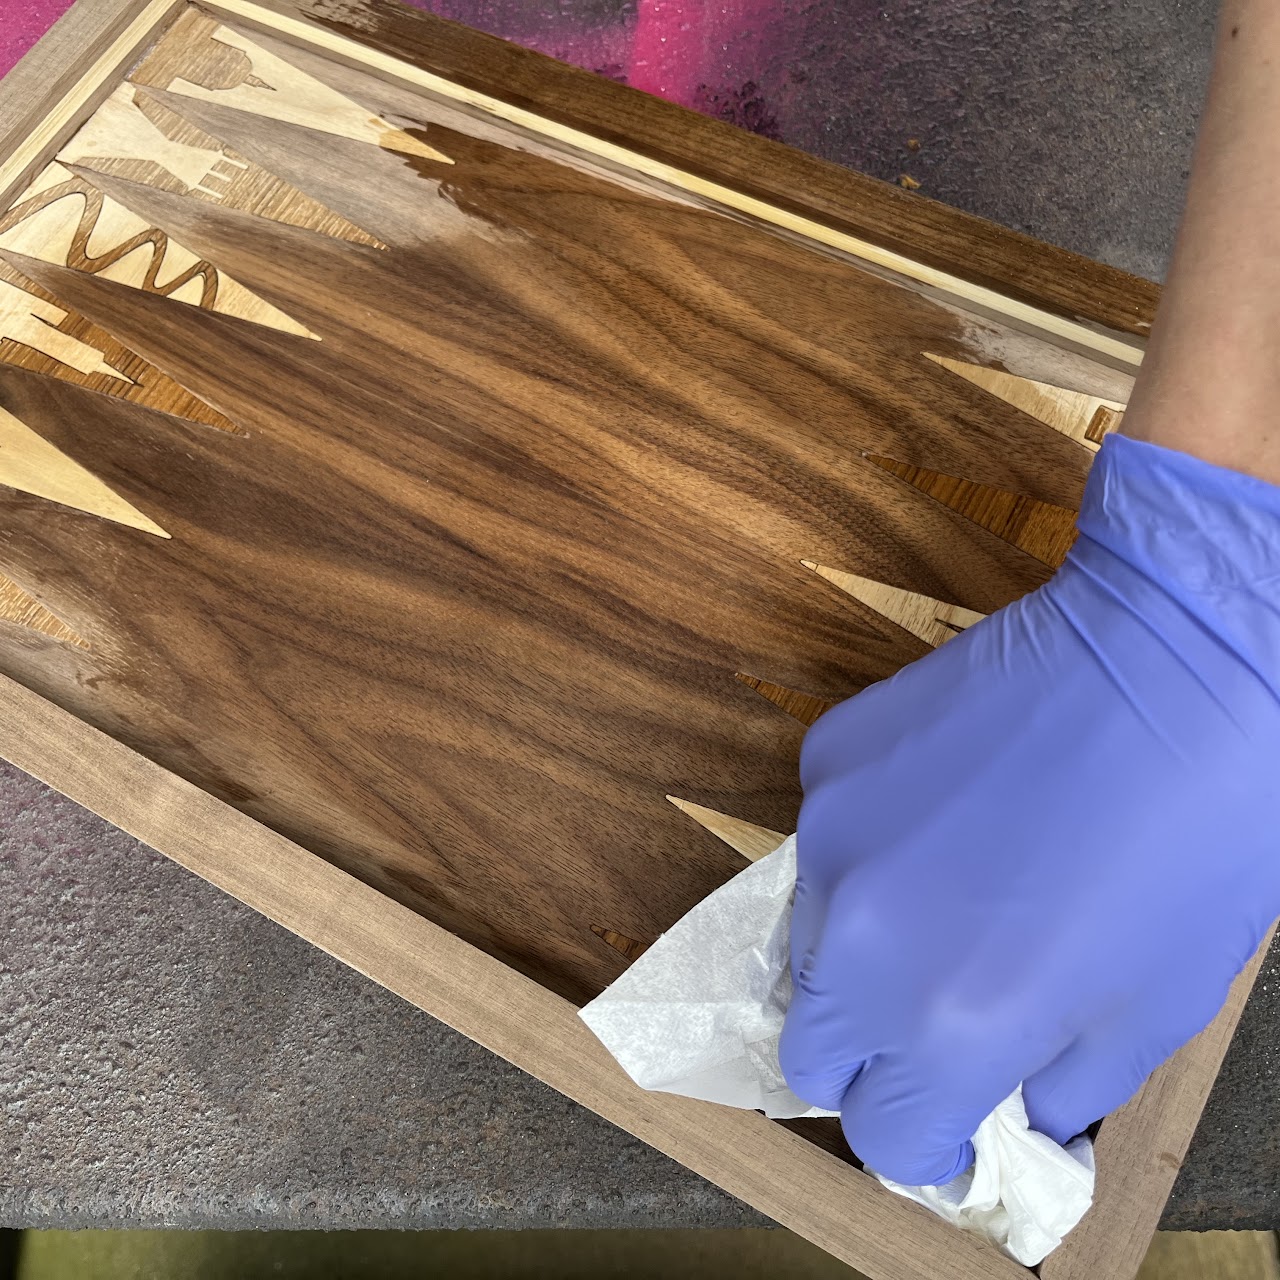
Finishing
Hoping for a shiny yet strong finish, I coated the board in multiple layers of wipe-on poly. This really brought out the differences between wood types, and looked stunning!
I connected the two halves with hinges and added a lock to the front.
Final Board
Can you name all 12 San Francisco monuments?